Why ?
If there is a scenario which is required to expose / provide
access to your SharePoint Data layer, especially to remote application(s) or
the applications which have been developed by using different platforms or
using technological framework other than Microsoft. Not only that but also, If
there is a requirement where you need to make a bridge between SharePoint
Client Object model and SharePoint Server Object model, Then out of many,
"WCF Service" will be your savior. Even though there are some
approaches to do the same job Eg: using REST API or SOAP Web services, In my
opinion these approaches are not feasible with real world requirements where
you don't get that much flexible like we do in WCF services.
How ?
Create SharePoint empty Project. Make it as a Farm solution.

Then you need to embed WCF host files into the project. To do that, there are three or four main approaches, that we can consider.
- Add a required .svc file (A .svc file contains a WCF-specific processing directive (@ServiceHost) that allows the WCF hosting infrastructure to activate hosted services in response to incoming messages. [ source : https://msdn.microsoft.com/en-us/library/aa751792(v=vs.110).aspx ] ) to the project. This is the wildly use approach where you will be able to find many references. To be extremely honest with you, I am not that comfortable with that approach as it involves lot of inline code involvement just to host the service . Eg: ref | http://social.technet.microsoft.com/wiki/contents/articles/24194.sharepoint-2013-create-a-custom-wcf-rest-service-hosted-in-sharepoint-and-deployed-in-a-wsp.aspx
- Add a WCF service files. With this approach you’ll be able to add all the required references to the project and the interaction between service class and Interface will be automatically configured. However, with this approach you will be required to Edit the web configuration (.webconfig) files, in order to make the things work smoothly. In-my opinion, I am not recommended editing webconfigs in SP projects.


- Add WCF service application separately into the solution, then extract and move required files to the main SharePoint project. This is the approach, which I am going to discuss here, as I find myself it’s a very less complex approach, where you are not tend to do any major mistakes.
Here after, I will demonstrate the required steps, based on
the third approach.
Add a SharePoint Mapped folder to ISAPI service folder ( ISAPI
: This directory contains all the standard Web Services for SharePoint and
resources and configuration files that the web services use)


The Add a WCF Service Application Project to the same
solution where you got you SP project. After that please do rename both .svc
and interface with same name as follows.


Then move .svc file to the ISAPI map directory in SharePoint
project which has been created before the service project and Move Interface
class to the top level (Out of ISAPI). Then Delete the Service Project, after
that Please Add “System.ServiceModel” and “System.ServiceModel.Web” references
to the SP project.

Then we need to change Namespace in Service Classes and Interface,
As following.

Open the Interface and remove all the [DataContract] alone with all [DataMember]s, and [OperationContract]s. then you will have an empty Interface class. Now add a one method which return a String.
Eg:
[OperationContract]
[WebGet(ResponseFormat = WebMessageFormat.Json, BodyStyle = WebMessageBodyStyle.Wrapped, UriTemplate = "ServiceMethod")]
string ServiceMethod();

Then
open the service class under the host directory (.svc) remove all the methods
and Implement the interface methods. In the Service class, make sure that Service
Contract Attribute need to be defined as follows. [NOTE: In WCF, all
services expose contracts. The contract is a platform-neutral and standard way
of describing what the service does. WCF defines four types of contracts. |
Source : https://www.safaribooksonline.com/library/view/programming-wcf-services/0596526997/ch01s04.html
]
BasicHttpBindingServiceMetadataExchangeEndpointAttribute]
[AspNetCompatibilityRequirements(RequirementsMode
= AspNetCompatibilityRequirementsMode.Required)]

Then Open .svc file and do change the Service namespace as
follows.

Then once you deploy the project (Only if there is NO
compile Errors), and try to access the service. You might get following Error.

In simple words, It says that, system fails to understand
the Service attribute’s “$SharePoint.Project.AssemblyFullName$” Part which, supposed
to be converted as the Full Assembly name. To check that, you can navigate to
the ISAPI folder in 15 hive, where you will be abet to locate your custom
service file.

When you open the service file you can point out the same conversion
issue.

To solve this issue, first we need to unload the project. Then
navigate the project location, Then open the project file “.csproj” using
Notepad then add following tag under the Property group.
“ <TokenReplacementFileExtensions>svc</TokenReplacementFileExtensions>
” , this help to identify the .svc file type.

Once you edit the file, you need to reload the project. Then
deploy it and check the service file in the ISAPI directory.

If things went smoothly, you would be able to see that, $SharePoint.Project.AssemblyFullName$
would be replaced by the full assembly name.

Now things should be working as it expected. If you got the
following Error, Please do check your service class attribute.


If not, then you should have following screen, then to generate Jason file. call the service method
Eg: http://xxxxxxx:xx/_vti_bin/WCFRestSampe1.svc/ServiceMethod
Eg: http://xxxxxxx:xx/_vti_bin/WCFRestSampe1.svc/ServiceMethod
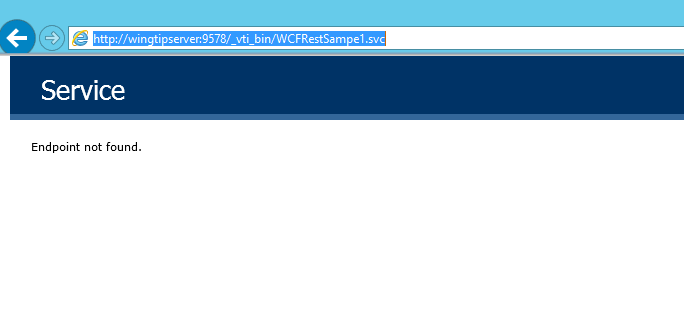

When you get the above issue with End point. Please change the sharepoint factory method of the service file into following.
Factory="Microsoft.SharePoint.Client.Services.MultipleBaseAddressBasicHttpBindingServiceHostFactory, Microsoft.SharePoint.Client.ServerRuntime, Version=15.0.0.0, Culture=neutral, PublicKeyToken=71e9bce111e9429c"
then you get the end point issue resolved.

Also you can check whether the WSDL is configured ok or not by accessing it - type "/mex" (http://xxxxxxx:xx/_vti_bin/WCFRestSampe1.svc/mex)then you should get something like following.

ok That's It ...
HAPPY CODING