Wednesday, March 2, 2016

Create Custom WCF service for SharePoint using Visual Studio.

Why ?


If there is a scenario which is required to expose / provide access to your SharePoint Data layer, especially to remote application(s) or the applications which have been developed by using different platforms or using technological framework other than Microsoft. Not only that but also, If there is a requirement where you need to make a bridge between SharePoint Client Object model and SharePoint Server Object model, Then out of many, "WCF Service" will be your savior. Even though there are some approaches to do the same job Eg: using REST API or SOAP Web services, In my opinion these approaches are not feasible with real world requirements where you don't get that much flexible like we do in WCF services.

How ?
Create SharePoint empty Project. Make it as a Farm solution.


Then you need to embed WCF host files into the project. To do that, there are three or four main approaches, that we can consider.


  • Add a WCF service files. With this approach you’ll be able to add all the required references to the project and the interaction between service class and Interface will be automatically configured. However, with this approach you will be required to Edit the web configuration (.webconfig) files, in order to make the things work smoothly. In-my opinion, I am not recommended editing webconfigs in SP projects.


  • Add WCF service application separately into the solution, then extract and move required files to the main SharePoint project. This is the approach, which I am going to discuss here, as I find myself it’s a very less complex approach, where you are not tend to do any major mistakes.


Here after, I will demonstrate the required steps, based on the third approach.
Add a SharePoint Mapped folder to ISAPI service folder ( ISAPI : This directory contains all the standard Web Services for SharePoint and resources and configuration files that the web services use)


The Add a WCF Service Application Project to the same solution where you got you SP project. After that please do rename both .svc and interface with same name as follows.


Then move .svc file to the ISAPI map directory in SharePoint project which has been created before the service project and Move Interface class to the top level (Out of ISAPI). Then Delete the Service Project, after that Please Add “System.ServiceModel” and “System.ServiceModel.Web” references to the SP project.


Then we need to change Namespace in Service Classes and Interface, As following.

Open the Interface and remove all the [DataContract] alone with all [DataMember]s, and  [OperationContract]s. then you will have an empty Interface class. Now add a one method which return a String. 
Eg:  
[OperationContract]
[WebGet(ResponseFormat = WebMessageFormat.Json, BodyStyle = WebMessageBodyStyle.Wrapped, UriTemplate = "ServiceMethod")]
 string ServiceMethod();


Then open the service class under the host directory (.svc) remove all the methods and Implement the interface methods. In the Service class, make sure that Service Contract Attribute need to be defined as follows. [NOTE: In WCF, all services expose contracts. The contract is a platform-neutral and standard way of describing what the service does. WCF defines four types of contracts. | Source : https://www.safaribooksonline.com/library/view/programming-wcf-services/0596526997/ch01s04.html ]

BasicHttpBindingServiceMetadataExchangeEndpointAttribute]
[AspNetCompatibilityRequirements(RequirementsMode = AspNetCompatibilityRequirementsMode.Required)]


Then Open .svc file and do change the Service namespace as follows.


Then once you deploy the project (Only if there is NO compile Errors), and try to access the service. You might get following Error.

In simple words, It says that, system fails to understand the Service attribute’s “$SharePoint.Project.AssemblyFullName$” Part which, supposed to be converted as the Full Assembly name. To check that, you can navigate to the ISAPI folder in 15 hive, where you will be abet to locate your custom service file.


When you open the service file you can point out the same conversion issue.


To solve this issue, first we need to unload the project. Then navigate the project location, Then open the project file “.csproj” using Notepad then add following tag under the Property group.
  “ <TokenReplacementFileExtensions>svc</TokenReplacementFileExtensions> ” , this help to identify the .svc file type.


Once you edit the file, you need to reload the project. Then deploy it and check the service file in the ISAPI directory.


If things went smoothly, you would be able to see that, $SharePoint.Project.AssemblyFullName$ would be replaced by the full assembly name.


Now things should be working as it expected. If you got the following Error, Please do check your service class attribute.

If not, then you should have following screen, then to generate Jason file. call the service method 
Eg: http://xxxxxxx:xx/_vti_bin/WCFRestSampe1.svc/ServiceMethod
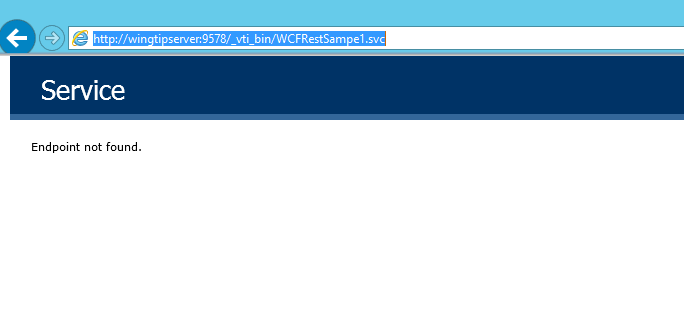

When you get the above issue with End point. Please change the sharepoint factory method of the service file into following.

Factory="Microsoft.SharePoint.Client.Services.MultipleBaseAddressBasicHttpBindingServiceHostFactory, Microsoft.SharePoint.Client.ServerRuntime, Version=15.0.0.0, Culture=neutral, PublicKeyToken=71e9bce111e9429c"

then you get the end point issue resolved.
Also you can check whether the WSDL is configured ok or not by accessing it - type "/mex" (http://xxxxxxx:xx/_vti_bin/WCFRestSampe1.svc/mex)then you should get something like following.


ok That's It ... 
HAPPY CODING

Wednesday, February 11, 2015

How to Create SharePoint package (.wsp) as part of the build process in Visual Studio 2012 /2013

Some of you have faced or may have noticed an issue when you create a SharePoint project in visual studio 2012 or 2013 you don't get a option called package like we had in VS 2010.

IN VS 2012 / 2013 we don't have this Package option. so what happen is that when you build a project it only create or update the DLL no WSP creation. WSP create only if you deploy the application through the Visual studio itself 


In VS 2012 or 2013 build commands are not embedded into the project file. so we need to add them manually if we need to create both dll and wsp in the build process.  

there is two way to edit VS project file

1) Unload the SharePoint project from the solution and right click on project then select Edit. The project will open in an editor.

2) Go-to the project location then you will find the CSPROJ File (.csproj) file. then you can edit even using Notepad.


Then add following tag into the following location.

<PropertyGroup>
    <BuildDependsOn>$(BuildDependsOn);CreatePackage</BuildDependsOn>
</PropertyGroup>


you will be asked to Reload the project after this file been saved. now when you build the project dll and wsp file will be created.

ok That's It ... 
HAPPY CODING

Friday, January 30, 2015

Create Custom Picture Library with List Definitions through Visual Studio

One of the major problem we faced when we try to create a picture library through a visual studio that, there is no any Definition type called picture of library, but we can add instance file based on picture library template. if we got a requirement to add a custom columns like we do in normal browser window through a list settings, simply we cannot do through a VS project as we cannot add fields in to a element file.  

When I faced kind of a situation where I need to add Lookup filed in to a Picture Library I did some research and found a one way to do it. here are the steps.

1) Create a Site column ( LookUp Field as follows )

 <Field
       ID="{63F1697D-35B8-40C0-BE33-6CCB44AD35AE}"
       Name="DPMCExternalLink"
       DisplayName="DPMC External Link"
       Type="Lookup"
       List="Lists/ExternalLink"
       ShowField="Title"
       Required="TRUE"
       Group="DPMC Site Columns">
  </Field>

Then create a Content type based in picture content type and added the above mentioned lookup filed in to the content type [ Note : you can added only site columns to the content type ]


[ Note : The feature which deploy  content type ans site column need to be as a site feature ]

2) After that  Create a List and select "Document Library" in SharePoint Customization Wizard window. then click content type button and delete document content type which was the default one and added you newly created content type then make it as a default content type. 


3) In the Library you can see some files been added along with the Instance module, Schema, and Element files. most of them are aspx and htlm file please remove all the aspx and html file. from the library.

4) Then navigate to the 15 hive folder.  TEMPLATE  > FEATURES > PictureLibrary > PicLib
[C:\Program Files\Common Files\microsoft shared\Web Server Extensions\15\TEMPLATE\FEATURES\PictureLibrary\PicLib]

copy all the aspx and html file then past it into the library. Then set those files Deployment Type as ElementFile.


5) Open schema file of the Picture library and add following fields / tags in to following positions.

ThumbnailSize="160" WebImageHeight="480" WebImageWidth="640" into the "<List xmlns:" tag.
Then <Folder TargetName="Forms/Picture" /> into the Defult content type.


Open Schema.xml  File in the 15 Hive [ \15\TEMPLATE\FEATURES\PictureLibrary\PicLib ] then copy Views and Forms sections from there and replace those in our Schema file . 

Then in the element file  do following changes
Type = "109" [need to change instance element file also]
Sequence = "210"
DocumentTemplate = "100"


ok That's It ... 
HAPPY CODING

Thursday, November 7, 2013

SharePoint Client Object Model ( SP - COM )
Part - 3

[ How to deal with a Web-part ]

In my previous posts I have talked about the Theoretical background of Client Object Model with ECMA script and Basic coding Techniques and syntax you need to know. through this I'm gonna concentrate on a real world business with COM. 

How to work with,Web part Properties.


One of the main concern when you implement functionality with ECMA script or COM, "How to access web part properties". and is there any direct syntax for this in COM, so the straight forward answer is "NO". there is no direct syntax which been implemented to access Web part properties. So then how to do that. 

 So as we know this is how you implement a web part property or added it inti the Web part,

[Category("Latest News Properties")]
[WebPartStorage(Storage.Shared)]
[WebDisplayName("List Name")]
[DefaultValue("NewsStory")]
[Description("This property will hold the name of the Latest News list")]
[XmlElement("ListName")]
[Personalizable(PersonalizationScope.Shared)]
[WebBrowsable(true)]
public string ListName { get; set; }


So the List name is our web part property which we need to access through COM script. Fist we need to have a Hidden field to fill the required property data. So that Hidden filed need to bee initialized in CreateChildControls() event

protected override void CreateChildControls()
{
       base.CreateChildControls();
       HiddenField hiddenWebPartProperties = new HiddenField() { ID = "hiddenFeaturedNewsWebPartProperties" };

       this.Controls.Add(hiddenWebPartProperties);
}

Then in the OnPreRender Event we filled the required Property data as follows, 

//Construct JSON using the WebPart Properties
 string webPartPropertiesJSON = string.Empty;
 webPartPropertiesJSON = "{" + "'ListName':'" + this.ListName + "', 'HtmlMarkup':'" + this.HtmlMarkup + "' }";
                     ((HiddenField)this.FindControl("hiddenFeaturedNewsWebPartProperties")).Value = webPartPropertiesJSON;

Here you can see I have added two properties Called List Name and Html Mar-up in to the hidden filed as Filled it like Jason Object.

Then we Initialize a Start - up Script and Called the Function called "InitializeFeaturedNews" by passing it the Web part Client ID. 
so Why we pass the Client ID will tell you.

Page.ClientScript.RegisterStartupScript(this.GetType(), this.ClientID, string.Format("InitializeFeaturedNews('{0}'); ", this.ClientID), true);

so after that it all-together something like this,

[ToolboxItemAttribute(false)]
       public class NewsStoryArea : System.Web.UI.WebControls.WebParts.WebPart
       {
              [Category("Latest News Properties")]
              [WebPartStorage(Storage.Shared)]
              [WebDisplayName("HTML Markup URL")]
              [DefaultValue("/Style Library/UserControlMarkup/NewsStoryArea.htm")]
              [Description("This property will hold the URL of Latest News Html Markup")]
              [XmlElement("HtmlMarkup")]
              [Personalizable(PersonalizationScope.Shared)]
              [WebBrowsable(true)]
              public string HtmlMarkup { get; set; }

              [Category("Latest News Properties")]
              [WebPartStorage(Storage.Shared)]
              [WebDisplayName("List Name")]
              [DefaultValue("NewsStory")]
              [Description("This property will hold the name of the Latest News list")]
              [XmlElement("ListName")]
              [Personalizable(PersonalizationScope.Shared)]
              [WebBrowsable(true)]
              public string ListName { get; set; }


              protected override void CreateChildControls()
              {
                     base.CreateChildControls();
                     HiddenField hiddenWebPartProperties = new HiddenField() { ID = "hiddenFeaturedNewsWebPartProperties" };

                     this.Controls.Add(hiddenWebPartProperties);
              }
              /// <summary>
              /// Raises the <see cref="E:System.Web.UI.Control.PreRender"/> event.
              /// </summary>
       /// <param name="e">An <see cref="T:System.EventArgs"/> object that contains the event data.</param>
              protected override void OnPreRender(EventArgs e)
              {
                     base.OnPreRender(e);

                     //Construct JSON using the WebPart Properties
                     string webPartPropertiesJSON = string.Empty;
                     webPartPropertiesJSON = "{" + "'ListName':'" + this.ListName + "', 'HtmlMarkup':'" + this.HtmlMarkup + "' }";
                     ((HiddenField)this.FindControl("hiddenFeaturedNewsWebPartProperties")).Value = webPartPropertiesJSON;

                    
                     Page.ClientScript.RegisterStartupScript(this.GetType(), this.ClientID, string.Format("InitializeFeaturedNews('{0}'); ", this.ClientID), true);
              }

Now Let's move to the Script Part. In your Script you have InitializeFeaturedNews Function 

function InitializeFeaturedNews(webPartClientId) {

ExecuteOrDelayUntilScriptLoaded(function () { ExecuteFeaturedNewsProcedure(webPartClientId); }, "sp.js");

}
There you passed the Web part client ID into the ExecuteFeaturedNewsProcedure function after loading the Sp.js
function ExecuteFeaturedNewsProcedure(webPartClientId) {

  
  var hiddenField = $('#' + webPartClientId + '_hiddenFeaturedNewsWebPartProperties')[0];
  var webpartProperies;

  if (hiddenField != undefined && hiddenField != null) {
        webpartProperies = eval("(" + hiddenField.value + ")");
     }
       //Getting List Properties from webpart property
   var featuredNewsHtmlMarkup = webpartProperies.HtmlMarkup;
   var newsListName = webpartProperies.ListName
      
}

This Is the way to extract Web part Property values from the hidden Filed Jason object. so then other things are like accessing list and all we have discussed in previous part.

Best way to Implement COM web part.

There is a different between the implementation of normal Web part and the web part which using COM, it's kind of a best practice or a good technique. please refer following attachment.

As you see we are not implement HTML markups in the Code front as we do in Visual web parts. so HTML markup is a separate file. through the Script code we bind it to the web part and all JS HTML CSS files are include into the web part so only you activate Web-part feature those will be uploaded. please refer following Attachment.


 And All other files like JS(ECMA Script), CSS and HTML files need to be added as contents so those will be copied into the feature.

in the Code level you can call then and Embed them as like this,
/// <summary>
              /// Raises the <see cref="E:System.Web.UI.Control.PreRender"/> event.
              /// </summary>
              /// <param name="e">An <see cref="T:System.EventArgs"/> object that contains the event data.</param>
              protected override void OnPreRender(EventArgs e)
              {
                     base.OnPreRender(e);

                     //Construct JSON using the WebPart Properties
                     string webPartPropertiesJSON = string.Empty;
                     webPartPropertiesJSON = "{" + "'ListName':'" + this.ListName + "', 'HtmlMarkup':'" + this.HtmlMarkup + "' }";
                     ((HiddenField)this.FindControl("hiddenFeaturedNewsWebPartProperties")).Value = webPartPropertiesJSON;

                     var styleLibraryPath = string.Format("{0}/Style Library", SPContext.Current.Site.ServerRelativeUrl.TrimEnd('/'));

                     Page.ClientScript.RegisterStartupScript(this.GetType(), this.ClientID, string.Format("InitializeFeaturedNews('{0}'); ", this.ClientID), true);

                     var scriptSlides = "ScriptSlides";
                     if (!Page.ClientScript.IsClientScriptIncludeRegistered(scriptSlides))
                     {
                           var script = styleLibraryPath + "/Scripts/slides.min.jquery.js";
                           Page.ClientScript.RegisterClientScriptInclude(this.GetType(), scriptSlides, ResolveClientUrl(script));
                     }

                     var scriptFeaturedNewsMarkupKey = "ScriptFeaturedNewsMarkup";
                     if (!Page.ClientScript.IsClientScriptIncludeRegistered(scriptFeaturedNewsMarkupKey))
                     {
                           var script = styleLibraryPath + "/Scripts/Client Object Model/NewsStoryArea.js";
                           Page.ClientScript.RegisterClientScriptInclude(this.GetType(), scriptFeaturedNewsMarkupKey, ResolveClientUrl(script));
                     }

                     var css = new CssRegistration();
                     css.Name = styleLibraryPath + "/ShawCor/en-us/NewsStoryArea.css";
                     css.After = CssAfter;
                     this.Controls.Add(css);
              }

              protected override void Render(HtmlTextWriter writer)
              {
                     this.RenderContents(writer);

                     writer.Write(
@"
<div id=""containerFeaturedNews"">
</div>
");
              }


and HTML mark-up can be Added using Jquery in this way,

//Getting List Properties from webpart property
       var featuredNewsHtmlMarkup = webpartProperies.HtmlMarkup;
       if ((_spPageContextInfo.webServerRelativeUrl) != "/") {
              featuredNewsHtmlMarkup = ((_spPageContextInfo.webServerRelativeUrl) + featuredNewsHtmlMarkup);
       }
       $.get(featuredNewsHtmlMarkup, function (data) {
              $(webPartControlId + ' #containerFeaturedNews').html(data);
              GetFeaturedNewsListItems(webPartControlId, webpartProperies);
       });

So the final result will be something like this.

ok That's It ... 
HAPPY CODING